
Page 376 - Kitab3DsMax
P. 376
Part III: Modeling Basics
Editing vertices
To edit a vertex, click the Vertex subobject in the Modifier Stack or select the vertex icon from the Selection
rollout (keyboard shortcut, 1). After the Vertex subobject type is selected, you can use the transform but-
tons on the main toolbar to move, rotate, and scale the selected vertex or vertices. Moving a vertex around
causes the associated spline segments to follow.
With a vertex selected, you can change its type from Corner, Smooth, Bézier, or Bézier Corner by right-
clicking and selecting the type from the pop-up quadmenu.
Caution
The New Vertex Type section in the top of the Geometry sets only the vertex type for new vertices created when
you Shift-copy segments and splines or new vertices created with the Cross Section button. These options cannot
be used to change vertex type for existing vertices. n
Selecting the Bézier or Bézier Corner type vertex reveals green-colored handles on either side of the vertex.
Dragging these handles away from the vertex alters the curvature of the segment. Bézier type vertices have
both handles in the same line, but Corner Bézier type vertices do not. This allows them to create sharp angles.
Note
Holding down the Shift key while clicking and dragging on a handle causes the handle to move independently of
the other handle, turning it into a Bézier Corner type vertex instead of a plain Bézier. You can use it to create
sharp corner points. n
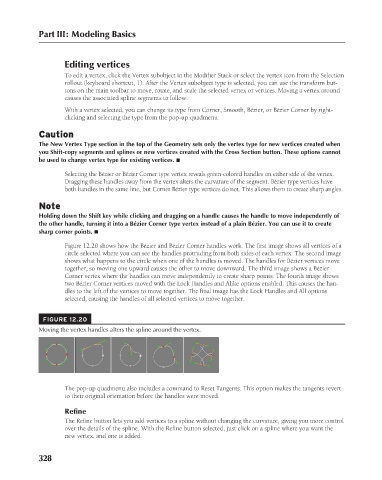
Figure 12.20 shows how the Bézier and Bézier Corner handles work. The first image shows all vertices of a
circle selected where you can see the handles protruding from both sides of each vertex. The second image
shows what happens to the circle when one of the handles is moved. The handles for Bézier vertices move
together, so moving one upward causes the other to move downward. The third image shows a Bézier
Corner vertex where the handles can move independently to create sharp points. The fourth image shows
two Bézier Corner vertices moved with the Lock Handles and Alike options enabled. This causes the han-
dles to the left of the vertices to move together. The final image has the Lock Handles and All options
selected, causing the handles of all selected vertices to move together.
FIGURE 12.20
Moving the vertex handles alters the spline around the vertex.
The pop-up quadmenu also includes a command to Reset Tangents. This option makes the tangents revert
to their original orientation before the handles were moved.
Refine
The Refine button lets you add vertices to a spline without changing the curvature, giving you more control
over the details of the spline. With the Refine button selected, just click on a spline where you want the
new vertex, and one is added.
328
6/30/10 4:20 PM
19_617779-ch12.indd 328
19_617779-ch12.indd 328 6/30/10 4:20 PM