
Page 423 - Kitab3DsMax
P. 423
Chapter 13: Modeling with Polygons and Patches
To create an octopus using the Extrude Along Spline feature, follow these steps:
1. Open the Octopus.max file from the Chap 13 directory on the DVD.
This file includes the base of an octopus created from a squashed sphere primitive that has been
converted to an Editable Poly. Eight splines surround the object.
2. Select the octopus object to automatically open the Modify panel. In the Selection rollout, click
the Polygon subobject button (keyboard shortcut, 4) and enable the Ignore Backfacing option in
the Selection rollout.
3. Right-click the Perspective viewport title, and select the Edged Faces option from the pop-up
menu (or press the F4 key).
This makes the polygons easier to see.
4. Click a single face object at the base of the sphere object, and click the Extrude Along Spline set-
tings dialog box button to open the Extrude Polygons Along Spline dialog box.
5. Click the Pick Spline button, and select the spline to the side of the face. Set the Segments to 6
and the Taper Amount to –1.0, and click OK. Make sure that the Align to Face Normal option
isn’t selected.
6. Repeat Steps 4 and 5 for each spline surrounding the octopus.
7. In the Subdivisions Surface rollout, enable the Use NURMS Subdivision option and set the
Display Iterations value to 2 to smooth the entire octopus.
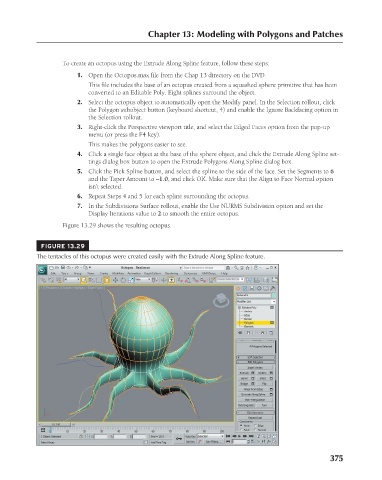
Figure 13.29 shows the resulting octopus.
FIGURE 13.29
The tentacles of this octopus were created easily with the Extrude Along Spline feature.
375
6/30/10 4:23 PM
20_617779-ch13.indd 375
20_617779-ch13.indd 375 6/30/10 4:23 PM