
Page 940 - Kitab3DsMax
P. 940
Part VIII: Advanced Animation Techniques
Cross-Ref
Chapter 21, “Understanding Animation and Keyframes,” covers key creation in more detail. n
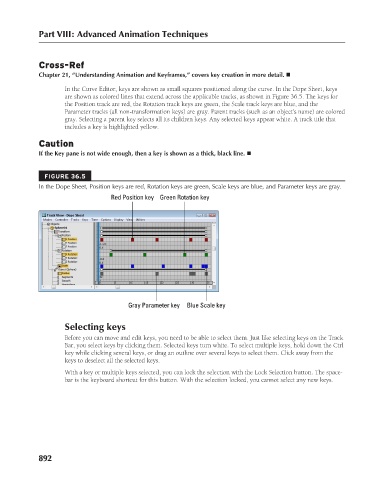
In the Curve Editor, keys are shown as small squares positioned along the curve. In the Dope Sheet, keys
are shown as colored lines that extend across the applicable tracks, as shown in Figure 36.5. The keys for
the Position track are red, the Rotation track keys are green, the Scale track keys are blue, and the
Parameter tracks (all non-transformation keys) are gray. Parent tracks (such as an object’s name) are colored
gray. Selecting a parent key selects all its children keys. Any selected keys appear white. A track title that
includes a key is highlighted yellow.
Caution
If the Key pane is not wide enough, then a key is shown as a thick, black line. n
FIGURE 36.5
In the Dope Sheet, Position keys are red, Rotation keys are green, Scale keys are blue, and Parameter keys are gray.
Red Position key Green Rotation key
Gray Parameter key Blue Scale key
Selecting keys
Before you can move and edit keys, you need to be able to select them. Just like selecting keys on the Track
Bar, you select keys by clicking them. Selected keys turn white. To select multiple keys, hold down the Ctrl
key while clicking several keys, or drag an outline over several keys to select them. Click away from the
keys to deselect all the selected keys.
With a key or multiple keys selected, you can lock the selection with the Lock Selection button. The space-
bar is the keyboard shortcut for this button. With the selection locked, you cannot select any new keys.
892