
Page 167 - Des Pawson "Pocket Guide to Knots & Splices"
P. 167
Pocket Guide to Knots & Splices
Method #2
1 With the standing part of the rope away
from you, take the working end in your
right hand and place it on top of the
standing part.
2 Put your thumb under the standing part.
3 Twist your right hand 180 degrees away
from you, to form a crossing turn with the
working end sticking up and through.
4 Take the working end round behind the
standing part.
5 Bring the working end down through the
hole formed by the crossing turn, and pull
tight to finish the knot.
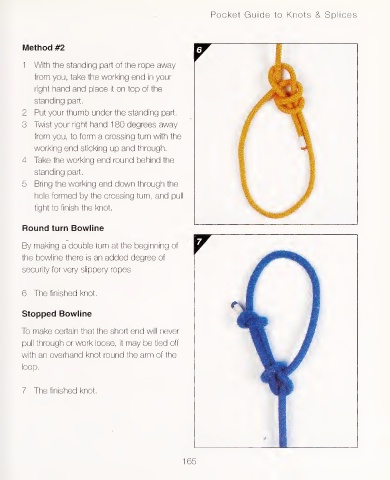
Round turn Bowline
By making a double turn at the beginning of
the bowline there is an added degree of
security for very slippery ropes
6 The finished knot.
Stopped Bowline
To make certain that the short end will never
pull through or work loose, it may be tied off
with an overhand knot round the arm of the
loop.
7 The finished knot.
165