
Page 41 - Des Pawson "Pocket Guide to Knots & Splices"
P. 41
Pocket Guide to Knots & Splices
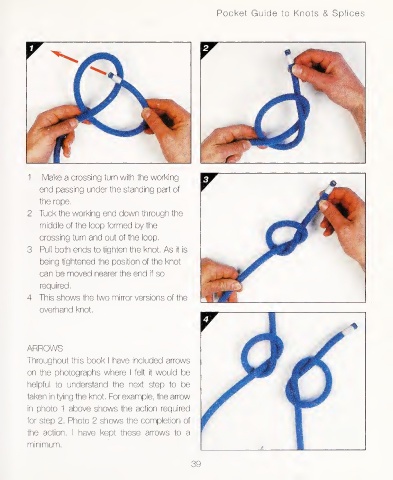
1 Make a crossing turn with the working
end passing under the standing part of
the rope.
2 Tuck the working end down through the
middle of the loop formed by the
crossing turn and out of the loop.
3 Pull both ends to tighten the knot. As it is
being tightened the position of the knot
can be moved nearer the end if so
required.
4 This shows the two mirror versions of the
overhand knot.
ARROWS
Throughout this book I have included arrows
on the photographs where I felt it would be
helpful to understand the next step to be
taken in tying the knot. For example, the arrow
in photo 1 above shows the action required
for step 2. Photo 2 shows the completion of
the action, I have kept these arrows to a
minimum.
39