
Page 719 - 2006 HARLEY FLSTCI SERVICE MANUAL
P. 719
1.7 BLEEDING
2
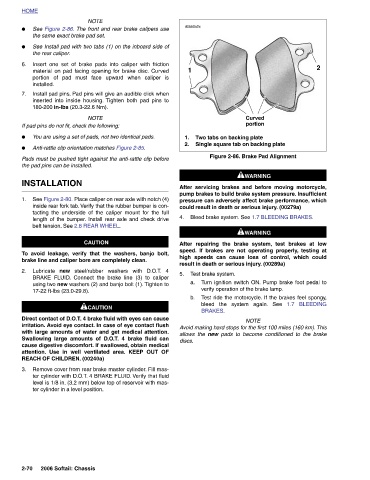
Curved portion Figure 2-86. Brake Pad Alignment 11WARNING 1WARNING After servicing brakes and before moving motorcycle, pump brakes to build brake system pressure. Insufficient pressure can adversely affect brake performance, which Bleed brake system. See 1.7 BLEEDING BRAKES. 11WARNING 1WARNING After repairing the brake system, test brakes at low speed. If brakes are not operating properly, testing at high speeds can cause loss of control, which could Turn ignition switch ON. Pump brake foot pedal to Test ride the motorcycle. If the brakes feel spongy, bleed the system again. See NOTE Avoid making hard stops for
Two tabs on backing plate Single square tab on backing plate could result in death or serious injury. (00279a) result in death or serious injury. (00289a) Test brake system. verify operation of the brake lamp. BRAKES. new
d0558a2x 1 a. b. allows the
2.
1.
4. 5. discs.
steel/rubber washers with D.O.T. 4
the same exact brake pad set. the rear caliper. 180-200 in-lbs (20.3-22.6 Nm). If pad pins do not fit, check the following: the pad pins can be installed. INSTALLATION belt tension. See 2.8 REAR WHEEL. new 17-22 ft-lbs (23.0-29.8). REACH OF CHILDREN. (00240a) ter cylinder in a level position. 2006 Softail: Chassis
NOTE See Figure 2-86. The front and rear brake calipers use See Install pad with two tabs (1) on the inboard side of Insert one set of brake pads into caliper with friction material on pad facing opening for brake disc. Curved portion of pad must face upward when caliper is Install pad pins. Pad pins will give an audible click when inserted into inside housing. Tighten both pad pins to NOTE You are using a set of pads, not two identical pads. Anti-rattle clip orientation matches Figure 2-85. Pads must be pushed tight against the anti-rattle clip before See Figure 2-80. Place caliper on rear axle with notch (4) inside rear fork tab. Verify that the
HOME ● ● 6. installed. 7. ● ● 1. To Lubricate 2. 3. 2-70