
Page 50 - 3D Artist 110 - 2017 UK
P. 50
RENDER A HIGH-POLY CHARACTER MODEL WITH KEYSHOT
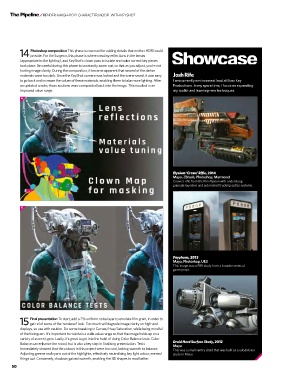
Photoshop composition This phase is reserved for adding details that neither HDRI could
14 provide. For the Surgeon, this phase is where creating relections in the lenses
(appropriate to the lighting), and KeyShot’s clown pass to isolate and value correct key pieces
took place. Be careful during this phase to constantly zoom out, so that as you adjust, you’re not
hurting image clarity. During the composition, it became apparent that several of the darker
materials were too dark. Since the KeyShot camera was locked and the scene saved, it was easy Josh Rife
to go back and increase the values of these materials, enabling them to take more lighting. After I am currently environment lead at Boss Key
an updated render, these sections were composited back into the image. This resulted in an Productions. In my spare time, I focus on expanding
improved value range. my toolkit and learning new techniques.
14
Elysium ‘Crowe’ Rifle, 2014
Maya, ZBrush, Photoshop, Marmoset
Crowe’s rile from the ilm Elysium with underslung
grenade launcher and automated tracking optics systems.
15
Payphone, 2013
Maya, Photoshop, UE3
This image was a PBR study from a broader series of
game props.
Final presentation To start, add a 2% uniform noise layer to emulate ilm grain, in order to
15 get rid of some of the ‘rendered’ look. Too much will degrade image clarity on high-end
displays, so use with caution. Do some tweaking in Curves/Hue/Saturation, while being mindful
of the histogram. It’s important to maintain a wide value range so that the image holds up on a
variety of screen types. Lastly, it’s great to get into the habit of doing Color Balance tests. Color
Droid Hard Surface Study, 2012
Balance can enhance the mood, but is also a key step in inalising presentation. Tests
Maya
immediately showed that the colours in this project were too cool, lacking warmth to balance.
This was a small sentry droid that was built as a subdivision
Adjusting greens and cyans out of the highlights, effectively neutralising key light colour, evened study in Maya.
things out. Conversely, shadows gained warmth, enabling the 3D shapes to read better.
50