
Page 48 - 3D Artist 110 - 2017 UK
P. 48
RENDER A HIGH-POLY CHARACTER MODEL WITH KEYSHOT
11
Keeping values in the
background consistent with how
your subject is lighting is key to
selling believability
Convey the mood Now that the assembly and materials
11 are in place, start to consider the mood of the inal
presentation. Thankfully, the subject matter in this case lends
itself to a feeling of the ominous, and the alien. Several render
tests were done with different HDRIs in KeyShot. The purpose
of these tests were to explore the extremes, and ultimately
nail the intended mood: sterile, corporate detachment. Blood,
stains and the backdrop seat it in a grounded, modern-day
medical environment. Try to achieve the overall mood of
the image through lighting and tone before relying on a
background. If the intended feeling can be achieved before
supplementing the render, the end result will be stronger.
Furthermore, working to a background early can be very
12
distracting when trying to dial in the tone.
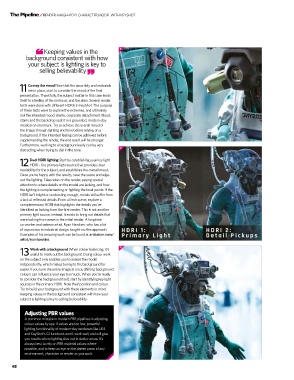
Dual HDRI lighting Start by establishing your key light
12 HDRI – the primary light source that provides clear
readability for the subject, and establishes the overall mood.
Once you’re happy with the results, save the scene and wipe
out the lighting. Take notes on the render, paying special
attention to where details on the model are lacking, and how
the lighting is complementing or ighting the focal points. If the
HDRI isn’t bright or contrasting enough, metals will suffer from
a lack of relected details. From a fresh scene, explore a
complementary HDRI that highlights the details you’ve
identiied as lacking from the irst render. This is not another
primary light source. Instead, it exists to bring out details that
were lacking from areas in the initial render. A longtime
co-worker and veteran artist, Ryan Hawkins, who has a lot
of experience in industrial design, taught me this approach.
Examples of his amazing work can be found at artstation.com/
artist/ryanhawkins.
Work with a background When colour balancing, it’s 13
13 useful to mask out the background. Doing colour work
on the subject only enables you to assess the model
independently, which makes tuning to the background far
easier. If you tune the entire image at once, shifting background
colours can inluence your eye too much. When you’re ready
to consider the background itself, start by identifying key light
sources in the primary HDRI. Note their position and colour.
Try to build your background with these elements in mind.
Keeping values in the background consistent with how your
subject is lighting is key to selling believability.
adjusting PBR values
A common mistake in modern PBR pipelines is adjusting
colour values by eye. If values are too low, powerful
lighting functionality of modern-day renderers like UE4
and KeyShot’s GI functions won’t work well, and will give
you results where lighting dies out in darker areas. It’s
always best to rely on PBR material values where
possible, and to keep an eye on the darker areas of any
environment, character or render as you work.
48