
Page 66 - 3D World - October 2017
P. 66
TuTorials
Create a portal effect
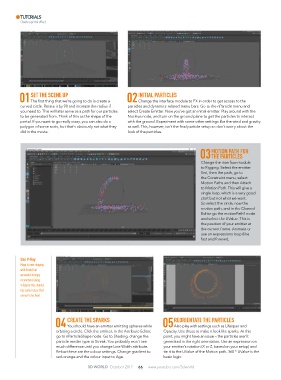
Set the Scene up InItIAl pARtIcleS
01The first thing that we’re going to do is create a 02 Change the interface module to FX in order to get access to the
curved circle. Rotate it by 90 and increase the radius if particles and dynamics-related menu bars. Go to the nParticle menu and
you need to. This will later serve as a path for our particles select Create Emitter. Now you’ve got an initial emitter. Play around with the
to be generated from. Think of this as the shape of the Nucleus node, and turn on the ground plane to get the particles to interact
portal. If you want to go really crazy, you can also do a with the ground. Experiment with some other settings like the wind and gravity
polygon of some sorts, but that’s obviously not what they as well. This, however, isn’t the final particle setup so don’t worry about the
did in the movie. look of the particles.
MotIon pAth foR
03the pARtIcleS
Change the interface module
to Rigging. Select the emitter
first, then the path, go to
the Constraint menu, select
Motion Paths and then Attach
to Motion Path. This will give a
single loop, which is a very good
start but not what we want.
So select the circle, now the
motion path, and in the Channel
Editor go the motionPath1 node
and select the UValue. This is
the position of your emitter at
the current frame. Animate or
use an expressions loop (like
fast and forever).
use V-Ray
Maya is now shipping
with Arnold but
we would strongly
recommend using
V-Ray for this. Arnold
has some issues that
are yet to be fixed.
cReAte the SpARkS ReoRIentAte the pARtIcleS
04 You should have an emitter emitting spheres while 05Also play with settings such as Lifespan and
orbiting a circle. Click the emitter, in the Attribute Editor, Opacity. Use these to make it look like sparks. At this
go to nParticleShape node. Go to Shading, change the point, you might have an issue – the particles aren’t
particle render type to Streak. You probably won’t see generated in the right orientation. Use an expression on
much difference until you change Line Width attribute. your emitter’s rotation (X or Z, based on your setup) and
Below these are the colour settings. Change gradient to tie it to the UValue of the Motion path. 360 * UValue is the
red-orange and the colour input to Age. basic logic.
3D WorlD October 2017 66 www.youtube.com/3dworld