
Page 119 - Divyank Tyagi
P. 119
|
exploRiNG oTheR ediTiNG Tools 85
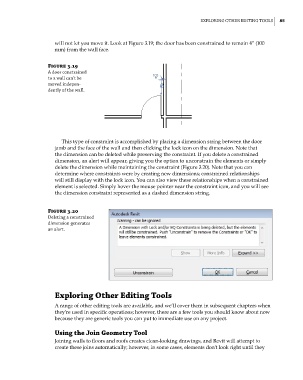
will not let you move it. Look at Figure 3.19; the door has been constrained to remain 4” (100
mm) from the wall face.
Figure 3.19
a door constrained
to a wall can’t be
moved indepen-
dently of the wall.
This type of constraint is accomplished by placing a dimension string between the door
jamb and the face of the wall and then clicking the lock icon on the dimension. Note that
the dimension can be deleted while preserving the constraint. If you delete a constrained
dimension, an alert will appear, giving you the option to unconstrain the elements or simply
delete the dimension while maintaining the constraint (Figure 3.20). Note that you can
determine where constraints were by creating new dimensions; constrained relationships
will still display with the lock icon. You can also view these relationships when a constrained
element is selected. Simply hover the mouse pointer near the constraint icon, and you will see
the dimension constraint represented as a dashed dimension string.
Figure 3.20
deleting a constrained
dimension generates
an alert.
Exploring Other Editing Tools
A range of other editing tools are available, and we’ll cover them in subsequent chapters when
they’re used in specific operations; however, there are a few tools you should know about now
because they are generic tools you can put to immediate use on any project.
Using the Join Geometry Tool
Joining walls to floors and roofs creates clean-looking drawings, and Revit will attempt to
create these joins automatically; however, in some cases, elements don’t look right until they
c03.indd 85 5/3/2014 10:31:02 AM