
Page 347 - Divyank Tyagi
P. 347
|
creATing forMUlA-driven MAssing 313
◆ H: 160’ (49 m)
◆ PW: 40’ (12 m)
◆ PH: 65’ (20 m)
◆ BA: 22°
◆ TA: 22°
4. Now finish the in-place mass by clicking the green check mark, which is the Finish Mass
button. Even though this is a generic model family, because you’ve placed it during
In-Place Mass mode, the software treats it as a mass.
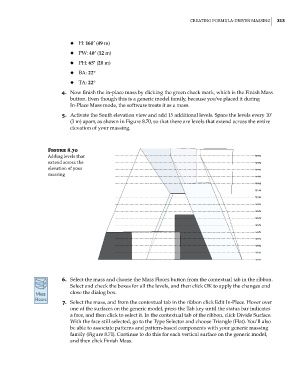
5. Activate the South elevation view and add 15 additional levels. Space the levels every 10’
(3 m) apart, as shown in Figure 8.70, so that there are levels that extend across the entire
elevation of your massing.
Figure 8.70
Adding levels that
extend across the
elevation of your
massing
6. Select the mass and choose the Mass Floors button from the contextual tab in the ribbon.
Select and check the boxes for all the levels, and then click OK to apply the changes and
close the dialog box.
7. Select the mass, and from the contextual tab in the ribbon click Edit In-Place. Hover over
one of the surfaces on the generic model, press the Tab key until the status bar indicates
a face, and then click to select it. In the contextual tab of the ribbon, click Divide Surface.
With the face still selected, go to the Type Selector and choose Triangle (Flat). You’ll also
be able to associate patterns and pattern-based components with your generic massing
family (Figure 8.71). Continue to do this for each vertical surface on the generic model,
and then click Finish Mass.
c08.indd 313 05-05-2014 16:47:51