
Page 470 - Divyank Tyagi
P. 470
436 | ChaptER 11 Visualization
3. When you return to the Visibility/Graphic Overrides dialog box, you’ll need to add the
filter to your view. Simply click Add, and select Rated Walls.
4. The next step is to customize the Rated Walls filter so that items that fall into the filter cat-
egory will have a specific graphic effect. Set the Projection/Surface override for Patterns
to Red and Solid Fill. To do this, select the Override button in that category to bring up
the dialog box shown in Figure 11.33. You’ll also want to choose the Override button for
both Lines and Patterns under the Cut heading and set each of their colors to Red, as you
just did for line graphics.
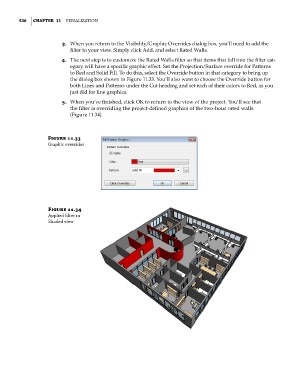
5. When you’ve finished, click OK to return to the view of the project. You’ll see that
the filter is overriding the project-defined graphics of the two-hour rated walls
(Figure 11.34).
Figure 11.33
graphic overrides
Figure 11.34
applied filter in
shaded view
c11.indd 436 5/3/2014 11:07:07 AM