
Page 779 - Divyank Tyagi
P. 779
|
laYing out sheets 745
If you haven’t noticed already, model views of the same scale will always snap to each other
without any special grids. What you might not realize is that this also works between views
of different types as long as they are of the same scale. For example, you can drag an elevation
from the Project Browser onto sheet G102 and see how it snaps in relation to the plan. Sections
can also be aligned with elevations and with plans. Even 3D views can be aligned with
each other.
adding the Schedule
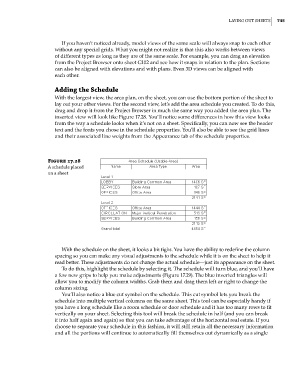
With the largest view, the area plan, on the sheet, you can use the bottom portion of the sheet to
lay out your other views. For the second view, let’s add the area schedule you created. To do this,
drag and drop it from the Project Browser in much the same way you added the area plan. The
inserted view will look like Figure 17.28. You’ll notice some differences in how this view looks
from the way a schedule looks when it’s not on a sheet. Specifically, you can now see the header
text and the fonts you chose in the schedule properties. You’ll also be able to see the grid lines
and their associated line weights from the Appearance tab of the schedule properties.
Figure 17.28
a schedule placed
on a sheet
With the schedule on the sheet, it looks a bit tight. You have the ability to redefine the column
spacing so you can make any visual adjustments to the schedule while it is on the sheet to help it
read better. These adjustments do not change the actual schedule—just its appearance on the sheet.
To do this, highlight the schedule by selecting it. The schedule will turn blue, and you’ll have
a few new grips to help you make adjustments (Figure 17.29). The blue inverted triangles will
allow you to modify the column widths. Grab them and drag them left or right to change the
column sizing.
You’ll also notice a blue cut symbol on the schedule. This cut symbol lets you break the
schedule into multiple vertical columns on the same sheet. This tool can be especially handy if
you have a long schedule like a room schedule or door schedule and it has too many rows to fit
vertically on your sheet. Selecting this tool will break the schedule in half (and you can break
it into half again and again) so that you can take advantage of the horizontal real estate. If you
choose to separate your schedule in this fashion, it will still retain all the necessary information
and all the portions will continue to automatically fill themselves out dynamically as a single
c17.indd 745 5/3/2014 11:46:31 AM