
Page 9 - File 1
P. 9
Manufacturing plan
Welding
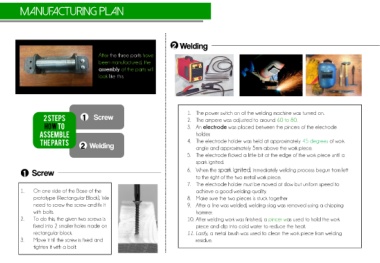
After the three parts have
been manufactured, the
assembly of the parts will
look like this.
2 Steps Screw 1. The power switch on of the welding machine was turned on.
2. The ampere was adjusted to around 60 to 80.
howto 3. An electrode was placed between the pincers of the electrode
assemble holder.
the parts Welding 4. The electrode holder was held at approximately 45 degrees of work
angle and approximately 5mm above the work piece.
5. The electrode flicked a little bit at the edge of the work piece until a
spark ignited.
Screw 6. When the spark ignited, immediately welding process begun from left
to the right of the two metal work piece.
7. The electrode holder must be moved at slow but uniform speed to
1. On one side of the Base of the achieve a good welding quality.
prototype (Rectangular Block), We 8. Make sure the two pieces is stuck together
need to screw the screw and fix it 9. After a line was welded, welding slag was removed using a chipping
with bolts. hammer.
2. To do this, the given two screws is 10. After welding work was finished, a pincer was used to hold the work
fixed into 2 smaller holes made on piece and dip into cold water to reduce the heat.
rectangular block. 11. Lastly, a metal brush was used to clean the work piece from welding
3. Move it till the screw is fixed and residue.
tighten it with a bolt.