
Page 1085 - Kitab3DsMax
P. 1085
For this tutorial, you position a patch object so it aligns with a background image and apply the Ripple
Space Warp to it.
To add ripples to a pond, follow these steps:
1. Open the Pond ripple.max file from the Chap 42 directory on the DVD.
This file includes a background image of a bridge matched to a patch grid where the pond is
located with a reflective material assigned to it.
Tip Tutorial: Creating pond ripples Chapter 42: Using Space Warps
If you’re having trouble locating the patch grid, press F3 to switch to Wireframe mode. n
2. Select the Create ➪ Space Warps ➪ Geometric/Deformable ➪ Ripple menu command. Drag in the
Perspective view to create a Space Warp object. In the Parameters rollout, set the Amplitudes to 2
and the Wave Length to 30.
3. Click the Bind to Space Warp button, and drag from the patch object to the Space Warp.
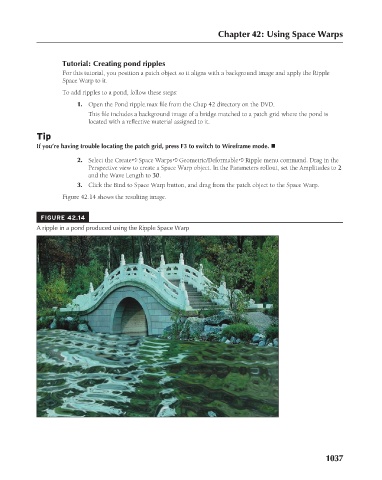
Figure 42.14 shows the resulting image.
FIGURE 42.14
A ripple in a pond produced using the Ripple Space Warp
1037