
Page 1186 - Kitab3DsMax
P. 1186
Part XI: Advanced Lighting and Rendering
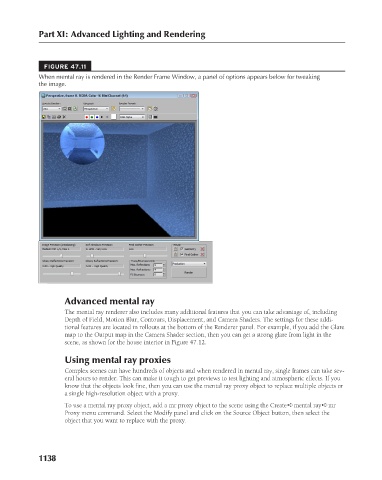
FIGURE 47.11
When mental ray is rendered in the Render Frame Window, a panel of options appears below for tweaking
the image.
Advanced mental ray
The mental ray renderer also includes many additional features that you can take advantage of, including
Depth of Field, Motion Blur, Contours, Displacement, and Camera Shaders. The settings for these addi-
tional features are located in rollouts at the bottom of the Renderer panel. For example, if you add the Glare
map to the Output map in the Camera Shader section, then you can get a strong glare from light in the
scene, as shown for the house interior in Figure 47.12.
Using mental ray proxies
Complex scenes can have hundreds of objects and when rendered in mental ray, single frames can take sev-
eral hours to render. This can make it tough to get previews to test lighting and atmospheric effects. If you
know that the objects look fine, then you can use the mental ray proxy object to replace multiple objects or
a single high-resolution object with a proxy.
To use a mental ray proxy object, add a mr proxy object to the scene using the Create ➪ mental ray ➪ mr
Proxy menu command. Select the Modify panel and click on the Source Object button, then select the
object that you want to replace with the proxy.
1138