
Page 827 - Kitab3DsMax
P. 827
Chapter 31: Painting in the Viewpoint Canvas and Rendering Surface Maps
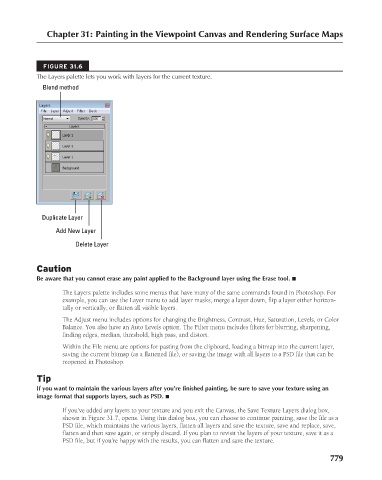
FIGURE 31.6
The Layers palette lets you work with layers for the current texture.
Blend method
Duplicate Layer
Add New Layer
Delete Layer
Caution
Be aware that you cannot erase any paint applied to the Background layer using the Erase tool. n
The Layers palette includes some menus that have many of the same commands found in Photoshop. For
example, you can use the Layer menu to add layer masks, merge a layer down, flip a layer either horizon-
tally or vertically, or flatten all visible layers.
The Adjust menu includes options for changing the Brightness, Contrast, Hue, Saturation, Levels, or Color
Balance. You also have an Auto Levels option. The Filter menu includes filters for blurring, sharpening,
finding edges, median, threshold, high pass, and distort.
Within the File menu are options for pasting from the clipboard, loading a bitmap into the current layer,
saving the current bitmap (as a flattened file), or saving the image with all layers to a PSD file that can be
reopened in Photoshop.
Tip
If you want to maintain the various layers after you’re finished painting, be sure to save your texture using an
image format that supports layers, such as PSD. n
If you’ve added any layers to your texture and you exit the Canvas, the Save Texture Layers dialog box,
shown in Figure 31.7, opens. Using this dialog box, you can choose to continue painting, save the file as a
PSD file, which maintains the various layers, flatten all layers and save the texture, save and replace, save,
flatten and then save again, or simply discard. If you plan to revisit the layers of your texture, save it as a
PSD file, but if you’re happy with the results, you can flatten and save the texture.
779