
Page 7 - Oct2020
P. 7
Painting the Panel Lines of your Aircraft
Once you have completed the paint scheme of your
airplane model kit, it’s time to tackle the panel lines.
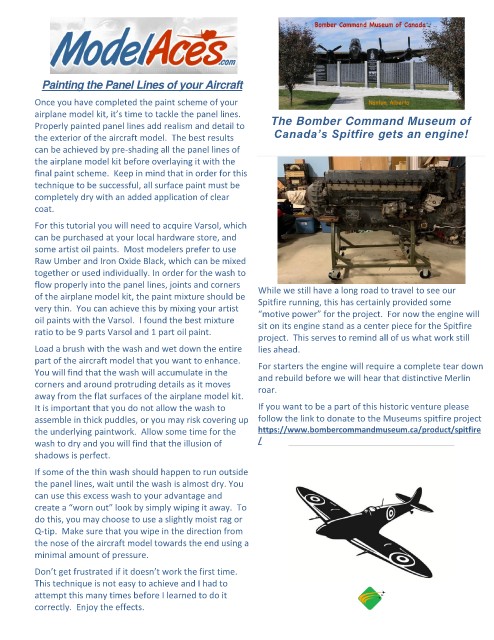
Properly painted panel lines add realism and detail to The Bomber Command Museum of
the exterior of the aircraft model. The best results Canada’s Spitfire gets an engine!
can be achieved by pre-shading all the panel lines of
the airplane model kit before overlaying it with the
final paint scheme. Keep in mind that in order for this
technique to be successful, all surface paint must be
completely dry with an added application of clear
coat.
For this tutorial you will need to acquire Varsol, which
can be purchased at your local hardware store, and
some artist oil paints. Most modelers prefer to use
Raw Umber and Iron Oxide Black, which can be mixed
together or used individually. In order for the wash to
flow properly into the panel lines, joints and corners
While we still have a long road to travel to see our
of the airplane model kit, the paint mixture should be Spitfire running, this has certainly provided some
very thin. You can achieve this by mixing your artist
“motive power” for the project. For now the engine will
oil paints with the Varsol. I found the best mixture
sit on its engine stand as a center piece for the Spitfire
ratio to be 9 parts Varsol and 1 part oil paint.
project. This serves to remind all of us what work still
Load a brush with the wash and wet down the entire lies ahead.
part of the aircraft model that you want to enhance.
For starters the engine will require a complete tear down
You will find that the wash will accumulate in the and rebuild before we will hear that distinctive Merlin
corners and around protruding details as it moves
roar.
away from the flat surfaces of the airplane model kit.
It is important that you do not allow the wash to If you want to be a part of this historic venture please
assemble in thick puddles, or you may risk covering up follow the link to donate to the Museums spitfire project
the underlying paintwork. Allow some time for the https://www.bombercommandmuseum.ca/product/spitfire
wash to dry and you will find that the illusion of /
shadows is perfect.
If some of the thin wash should happen to run outside
the panel lines, wait until the wash is almost dry. You
can use this excess wash to your advantage and
create a “worn out” look by simply wiping it away. To
do this, you may choose to use a slightly moist rag or
Q-tip. Make sure that you wipe in the direction from
the nose of the aircraft model towards the end using a
minimal amount of pressure.
Don’t get frustrated if it doesn’t work the first time.
This technique is not easy to achieve and I had to
attempt this many times before I learned to do it
correctly. Enjoy the effects.