
Page 20 - Belanger Y-Sections
P. 20
BELANGER Y-SECTIONS
Installation
Assembly of DXD Y-section
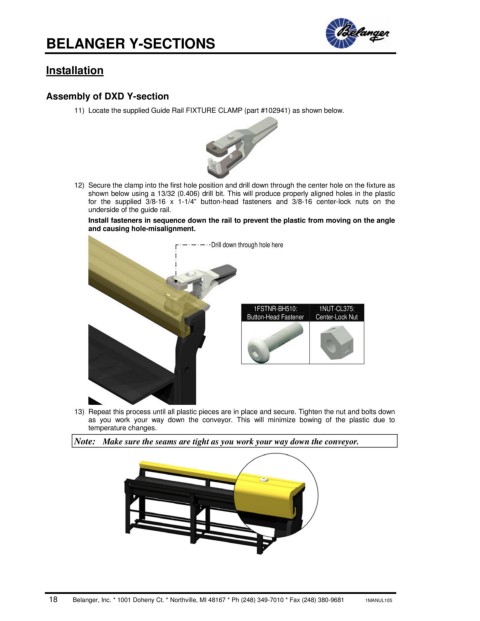
11) Locate the supplied Guide Rail FIXTURE CLAMP (part #102941) as shown below.
12) Secure the clamp into the first hole position and drill down through the center hole on the fixture as
shown below using a 13/32 (0.406) drill bit. This will produce properly aligned holes in the plastic
for the supplied 3/8-16 x 1-1/4” button-head fasteners and 3/8-16 center-lock nuts on the
underside of the guide rail.
Install fasteners in sequence down the rail to prevent the plastic from moving on the angle
and causing hole-misalignment.
Drill down through hole here
1FSTNR-BH510: 1NUT-CL375:
Button-Head Fastener Center-Lock Nut
13) Repeat this process until all plastic pieces are in place and secure. Tighten the nut and bolts down
as you work your way down the conveyor. This will minimize bowing of the plastic due to
temperature changes.
Note: Make sure the seams are tight as you work your way down the conveyor.
18 Belanger, Inc. * 1001 Doheny Ct. * Northville, MI 48167 * Ph (248) 349-7010 * Fax (248) 380-9681 1MANUL105