
Page 56 - AirBlade® Dryer Signature® Series
P. 56
AIRBLADE® DRYER Signature ® Series
Installation
AirBlade® Express 180, Frame Assembly
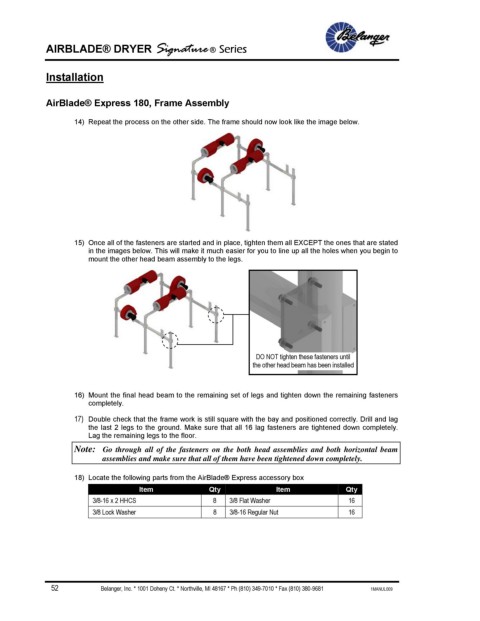
14) Repeat the process on the other side. The frame should now look like the image below.
15) Once all of the fasteners are started and in place, tighten them all EXCEPT the ones that are stated
in the images below. This will make it much easier for you to line up all the holes when you begin to
mount the other head beam assembly to the legs.
DO NOT tighten these fasteners until
the other head beam has been installed
16) Mount the final head beam to the remaining set of legs and tighten down the remaining fasteners
completely.
17) Double check that the frame work is still square with the bay and positioned correctly. Drill and lag
the last 2 legs to the ground. Make sure that all 16 lag fasteners are tightened down completely.
Lag the remaining legs to the floor.
Note: Go through all of the fasteners on the both head assemblies and both horizontal beam
assemblies and make sure that all of them have been tightened down completely.
18) Locate the following parts from the AirBlade® Express accessory box
Item Qty Item Qty
3/8-16 x 2 HHCS 8 3/8 Flat Washer 16
3/8 Lock Washer 8 3/8-16 Regular Nut 16
52 Belanger, Inc. * 1001 Doheny Ct. * Northville, MI 48167 * Ph (810) 349-7010 * Fax (810) 380-9681 1MANUL009