
Page 68 - 3D Artist 110 - 2017 UK
P. 68
Techniques
Our experts subsTance designer
The best artists from
around the world reveal Texture
specific CG techniques
substance
designer industrial
Joshua Lynch
joshlynch.artstation.com
Joshua Lynch is a
senior environment/ grime
texture artist and has
contributed to multiple
triple-A projects
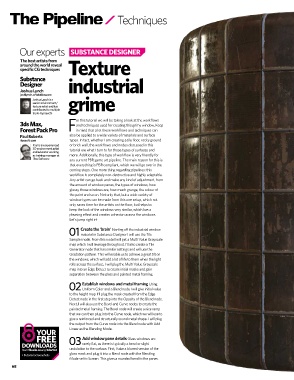
or this tutorial we will be taking a look at the worklows
3ds Max, and techniques used for creating this grimy window. Keep
Forest Pack Pro Fin mind that a lot these worklows and techniques can
Paul Roberts also be applied to a wide variety of materials and surface
itoosoft.com types. In fact, whether I am creating a tile loor, rocky ground
Paul is an experienced or brick wall, the worklows and nodes discussed in this
3D environment artist tutorial are what I turn to for those types of surfaces and
and educator working
as training manager at more. Additionally, this type of worklow is very friendly for
iToo Software any current PBR game art pipeline. The main reason for this is
that everything is PBR compliant, which we will go over in the
coming steps. One more thing regarding pipelines: this
worklow is completely non-destructive and highly adaptable.
Any artist can go back and make any kind of adjustment, from
the amount of window panes, the types of windows, how
glossy those windows are, how much grunge, the colour of
the paint and so on. Not only that, but a wide variety of
window types can be made from this one setup, which not
only saves time for the artists on the loor, but helps to
keep the look of the windows very similar, which has a
pleasing effect and creates cohesion across the windows.
Let’s jump right in!
Create the ‘brain’ Starting off the industrial window
01 material in Substance Designer I will use the Tile
Sampler node. From this node I will get a Multi Value Grayscale
map which I will leverage throughout. I’ll also create a Tile
Generator node that has similar settings and will use the
Gradation pattern. This will enable us to achieve a great tilt on
the windows, which will add a lot of life to them when the light
rolls across the surface. I will plug the Multi Value Grayscale
map into an Edge Detect to create initial masks and gain
separation between the glass and painted metal framing.
Establish windows and metal framing Using
02 Uniform Color and a Blend node I will give initial value
to the height map. I’ll plug the mask created from the Edge
Detect node in the irst step into the Opacity of the Blend node.
Next, I will also use the Bevel and Curve nodes to create the
painted metal framing. The Bevel node will create a nice ramp
that we can then plug into the Curve node, which we will use to
give a reinforced and structurally sound metal shape. I will plug
the output from the Curve node into the Blend node with Add
Linear as the Blending Mode.
YOur
Free Add window pane details Glass windows are
dOWnLOads 03 rarely lat, as there is typically a bend or slight
from ilesilo.co.uk/3dartist undulation to the surface. First, I take a blurred version of the
glass mask and plug it into a Blend node with the Blending
• Tutorial screenshots
Mode set to Screen. This gives a rounded bend to the panes.
68