
Page 69 - 3D Artist 110 - 2017 UK
P. 69
Additionally, I take the output of the Tile Generator node
with the Gradation pattern to create the slope effect, plugging
the Gradation map into a Blend node with the Blending Mode
set to Subtract. Both of these steps help to break the pane’s
rigidity and force the light to shift as it rolls across the surface.
Add patterns We can add features such as
04 rounded dots or wavy patterns. Doing this will give
unique surface qualities to speciic panes of glass and will add
more visual interest. I created the dots using a Tile Sampler
node and the wavy pattern was created using a Perlin Noise
Zoom node. Each of these patterns were applied using a mask
derived from the Multi Value Grayscale created in Step 1. I plug
the Multi Value Grayscale into a Histogram Scan node to
isolate speciic panes of glass. Feel free to throw in a Histogram
Shift node to randomise the Multi Value Grayscale map.
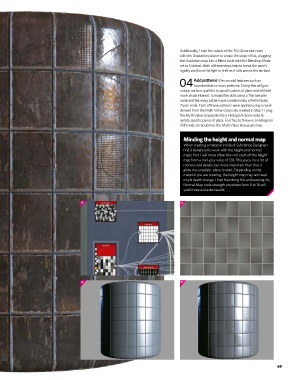
Minding the height and normal map
When creating a material inside of Substance Designer I
ind it beneicial to work with the height and normal
maps irst. I will more often than not start off the height
map from a mid-grey value of 128. This gives me a lot of
room to add details, but more important than that, it
gives me a realistic place to start. Depending on the
material you are creating, the height map may not need
much depth change. I ind that doing this and keeping my
Normal Map node strength anywhere from 8 to 16 will
yield more accurate results.
01 03
02 04
69