
Page 287 - Divyank Tyagi
P. 287
|
eXportIng CaD Data 253
Export All Properties BYLAYER, But Do Not Export Overrides If the recipient of your
CAD file will use scripts or macros to enforce their own graphic standards to the exported
data, select this option. Using the wall example again, the wall elements would be assigned
to the A-WALL layer; however, the dashed line overrides would not be exported. This style of
export is usually appropriate for engineers who need to use architectural plans as background
information and thus will override all elements to halftone.
Export All Properties BYLAYER, And Create New Layers For Overrides This final
option will assign default objects to layers based on their categories; however, any elements
with graphic overrides will be assigned to new layers that are subsets of the original layer.
Continuing with the previous wall example, the unmodified wall elements will be assigned
to the A-WALL layer, but the overridden edge will be assigned to a new layer such as
A-WALL-3, where the properties of the element are all BYLAYER and the new layer contains
the dashed linetype. In our opinion, this option is less useful because there is no control
over the naming of the new layers, thus creating potential confusion for the recipients of the
exported files.
Load Layers from Standards
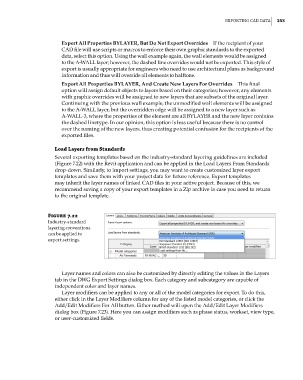
Several exporting templates based on the industry-standard layering guidelines are included
(Figure 7.22) with the Revit application and can be applied in the Load Layers From Standards
drop-down. Similarly, to import settings, you may want to create customized layer export
templates and save them with your project data for future reference. Export templates
may inherit the layer names of linked CAD files in your active project. Because of this, we
recommend saving a copy of your export templates in a Zip archive in case you need to return
to the original template.
Figure 7.22
Industry- standard
layering conventions
can be applied to
export settings.
Layer names and colors can also be customized by directly editing the values in the Layers
tab in the DWG Export Settings dialog box. Each category and subcategory are capable of
independent color and layer names.
Layer modifiers can be applied to any or all of the model categories for export. To do this,
either click in the Layer Modifiers column for any of the listed model categories, or click the
Add/Edit Modifiers For All button. Either method will open the Add/Edit Layer Modifiers
dialog box (Figure 7.23). Here you can assign modifiers such as phase status, workset, view type,
or user-customized fields.
c07.indd 253 5/3/2014 10:48:59 AM