
Page 523 - Divyank Tyagi
P. 523
|
using extended Modeling teChniques for BasiC Walls 489
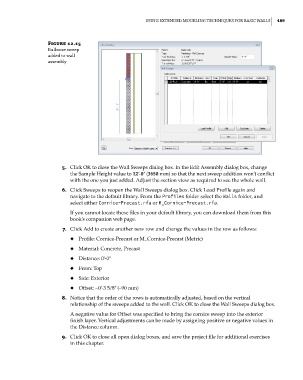
Figure 12.15
Bullnose sweep
added to wall
assembly
5. Click OK to close the Wall Sweeps dialog box. In the Edit Assembly dialog box, change
the Sample Height value to 12ʹ-0ʺ (3650 mm) so that the next sweep addition won’t conflict
with the one you just added. Adjust the section view as required to see the whole wall.
6. Click Sweeps to reopen the Wall Sweeps dialog box. Click Load Profile again and
navigate to the default library. From the Profiles folder select the Walls folder, and
select either Cornice-Precast.rfa or M_Cornice-Precast.rfa.
If you cannot locate these files in your default library, you can download them from this
book’s companion web page.
7. Click Add to create another new row and change the values in the row as follows:
◆ Profile: Cornice-Precast or M_Cornice-Precast (Metric)
◆ Material: Concrete, Precast
◆ Distance: 0ʹ-0ʺ
◆ From: Top
◆ Side: Exterior
◆ Offset: –0ʹ-3 5/8ʺ (–90 mm)
8. Notice that the order of the rows is automatically adjusted, based on the vertical
relationship of the sweeps added to the wall. Click OK to close the Wall Sweeps dialog box.
A negative value for Offset was specified to bring the cornice sweep into the exterior
finish layer. Vertical adjustments can be made by assigning positive or negative values in
the Distance column.
9. Click OK to close all open dialog boxes, and save the project file for additional exercises
in this chapter.
c12.indd 489 5/3/2014 11:12:37 AM