
Page 91 - Photoshop for Lightroom Users – Scott Kelby 2nd Edition
P. 91
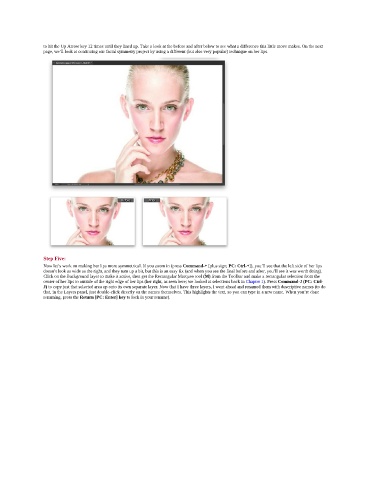
to hit the Up Arrow key 12 times until they lined up. Take a look at the before and after below to see what a difference this little move makes. On the next
               page, we’ll look at continuing our facial symmetry project by using a different (but also very popular) technique on her lips.


               Step Five:
               Now let’s work on making her lips more symmetrical. If you zoom in (press Command-+ [plus sign; PC: Ctrl-+]), you’ll see that the left side of her lips
               doesn’t look as wide as the right, and they turn up a bit, but this is an easy fix (and when you see the final before and after, you’ll see it was worth doing).
               Click on the Background layer to make it active, then get the Rectangular Marquee tool (M) from the Toolbar and make a rectangular selection from the
               center of her lips to outside of the right edge of her lips (her right, as seen here; we looked at selections back in Chapter 1). Press Command-J (PC: Ctrl-
               J) to copy just that selected area up onto its own separate layer. Now that I have three layers, I went ahead and renamed them with descriptive names (to do
               that, in the Layers panel, just double-click directly on the names themselves. This highlights the text, so you can type in a new name. When you’re done
               renaming, press the Return [PC: Enter] key to lock in your rename).