
Page 93 - Photoshop for Lightroom Users – Scott Kelby 2nd Edition
P. 93
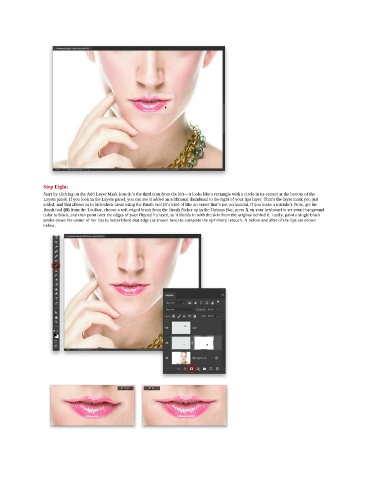
Step Eight:
               Start by clicking on the Add Layer Mask icon (it’s the third icon from the left—it looks like a rectangle with a circle in its center) at the bottom of the
               Layers panel. If you look in the Layers panel, you can see it added an additional thumbnail to the right of your lips layer. That’s the layer mask you just
               added, and that allows us to hide/show areas using the Brush tool (it’s kind of like an eraser that’s not permanent, if you make a mistake). Now, get the
               Brush tool (B) from the Toolbar, choose a soft-edged brush from the Brush Picker up in the Options Bar, press X on your keyboard to set your Foreground
               color to black, and then paint over the edges of your flipped lip layer, so it blends in with the skin from the original behind it. Lastly, paint a single black
               stroke down the center of her lips to better blend that edge (as shown here) to complete the symmetry retouch. A before and after of the lips are shown
               below.