
Page 539 - Kitab3DsMax
P. 539
Chapter 17: Adding Material Details with Maps
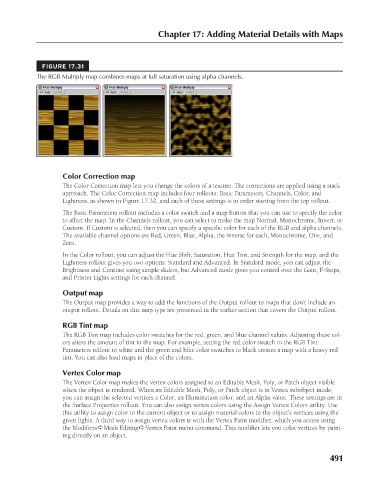
FIGURE 17.31
The RGB Multiply map combines maps at full saturation using alpha channels.
Color Correction map
The Color Correction map lets you change the colors of a texture. The corrections are applied using a stack
approach. The Color Correction map includes four rollouts: Basic Parameters, Channels, Color, and
Lightness, as shown in Figure 17.32, and each of these settings is in order starting from the top rollout.
The Basic Parameters rollout includes a color swatch and a map button that you can use to specify the color
to affect the map. In the Channels rollout, you can select to make the map Normal, Monochrome, Invert, or
Custom. If Custom is selected, then you can specify a specific color for each of the RGB and alpha channels.
The available channel options are Red, Green, Blue, Alpha, the inverse for each, Monochrome, One, and
Zero.
In the Color rollout, you can adjust the Hue Shift, Saturation, Hue Tint, and Strength for the map, and the
Lightness rollout gives you two options: Standard and Advanced. In Standard mode, you can adjust the
Brightness and Contrast using simple sliders, but Advanced mode gives you control over the Gain, F-Stops,
and Printer Lights settings for each channel.
Output map
The Output map provides a way to add the functions of the Output rollout to maps that don’t include an
output rollout. Details on this map type are presented in the earlier section that covers the Output rollout.
RGB Tint map
The RGB Tint map includes color swatches for the red, green, and blue channel values. Adjusting these col-
ors alters the amount of tint in the map. For example, setting the red color swatch in the RGB Tint
Parameters rollout to white and the green and blue color swatches to black creates a map with a heavy red
tint. You can also load maps in place of the colors.
Vertex Color map
The Vertex Color map makes the vertex colors assigned to an Editable Mesh, Poly, or Patch object visible
when the object is rendered. When an Editable Mesh, Poly, or Patch object is in Vertex subobject mode,
you can assign the selected vertices a Color, an Illumination color, and an Alpha value. These settings are in
the Surface Properties rollout. You can also assign vertex colors using the Assign Vertex Colors utility. Use
this utility to assign color to the current object or to assign material colors to the object’s vertices using the
given lights. A third way to assign vertex colors is with the Vertex Paint modifier, which you access using
the Modifiers ➪ Mesh Editing ➪ Vertex Paint menu command. This modifier lets you color vertices by paint-
ing directly on an object.
491
6/30/10 4:25 PM
25_617779-ch17.indd 491
25_617779-ch17.indd 491 6/30/10 4:25 PM