
Page 1423 - Workshop Manual - Aumark (BJ1051)
P. 1423
72-11
Windscreen/Window glass/Rearview mirror-Front Windscreen
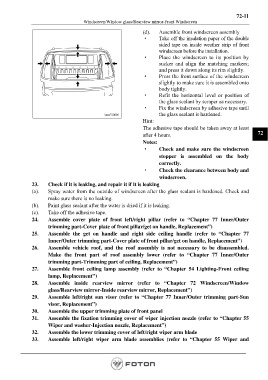
(d). Assemble front windscreen assembly
· Take off the insulation paper of the double
sided tape on inside weather strip of front
windscreen before the installation.
· Place the windscreen to its position by
sucker and align the matching markers;
and press it down along its rim slightly.
· Press the front surface of the windscreen
slightly to make sure it is assembled onto
body tightly.
· Refit the horizontal level or position of
the glass sealant by scraper as necessary.
· Fix the windscreen by adhesive tape until
the glass sealant is hardened.
Hint:
The adhesive tape should be taken away at least
after 4 hours. 72
Notes:
· Check and make sure the windscreen
stopper is assembled on the body
correctly.
· Check the clearance between body and
windscreen.
23. Check if it is leaking, and repair it if it is leaking
(a). Spray water from the outside of windscreen after the glass sealant is hardened. Check and
make sure there is no leaking.
(b). Paint glass sealant after the water is dried if it is leaking.
(c). Take off the adhesive tape.
24. Assemble cover plate of front left/right pillar (refer to “Chapter 77 Inner/Outer
trimming part-Cover plate of front pillar/get on handle, Replacement”)
25. Assemble the get on handle and right side ceiling handle (refer to “Chapter 77
Inner/Outer trimming part-Cover plate of front pillar/get on handle, Replacement”)
26. Assemble vehicle roof, and the roof assembly is not necessary to be disassembled.
Make the front part of roof assembly lower (refer to “Chapter 77 Inner/Outer
trimming part-Trimming part of ceiling, Replacement”)
27. Assemble front ceiling lamp assembly (refer to “Chapter 54 Lighting-Front ceiling
lamp, Replacement”)
28. Assemble inside rearview mirror (refer to “Chapter 72 Windscreen/Window
glass/Rearview mirror-Inside rearview mirror, Replacement”)
29. Assemble left/right sun visor (refer to “Chapter 77 Inner/Outer trimming part-Sun
visor, Replacement”)
30. Assemble the upper trimming plate of front panel
31. Assemble the fixation trimming cover of wiper injection nozzle (refer to “Chapter 55
Wiper and washer-Injection nozzle, Replacement”)
32. Assemble the lower trimming cover of left/right wiper arm blade
33. Assemble left/right wiper arm blade assemblies (refer to “Chapter 55 Wiper and
washer-Wiper arm assembly, Replacement”)
Page 1423