
Page 79 - Zoo Animal Learning and Training
P. 79
Chapter 4 Facility and Equipment Maintenance – Cleaning for Disease Control 63
FIGURE 4.6 Air‐cooled clipper head being lubricated.
a brush clean the hair from the surfaces. When fin-
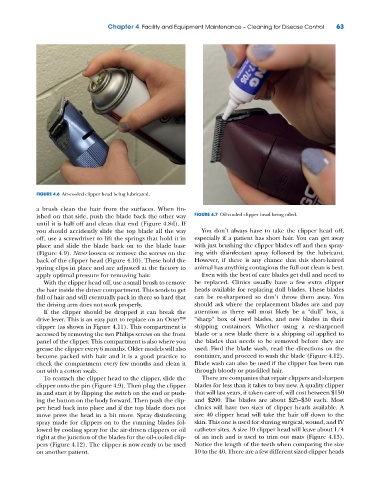
ished on that side, push the blade back the other way FIGURE 4.7 Oil‐cooled clipper head being oiled.
until it is half off and clean that end (Figure 4.8d). If
you should accidently slide the top blade all the way You don’t always have to take the clipper head off,
off, use a screwdriver to lift the springs that hold it in especially if a patient has short hair. You can get away
place and slide the blade back on to the blade base with just brushing the clipper blades off and then spray-
(Figure 4.9). Never loosen or remove the screws on the ing with disinfectant spray followed by the lubricant.
back of the clipper head (Figure 4.10). These hold the However, if there is any chance that this short‐haired
spring clips in place and are adjusted at the factory to animal has anything contagious the full out clean is best.
apply optimal pressure for removing hair. Even with the best of care blades get dull and need to
With the clipper head off, use a small brush to remove be replaced. Clinics usually have a few extra clipper
the hair inside the driver compartment. This tends to get heads available for replacing dull blades. These blades
full of hair and will eventually pack in there so hard that can be re‐sharpened so don’t throw them away. You
the driving arm does not work properly. should ask where the replacement blades are and pay
If the clipper should be dropped it can break the attention as there will most likely be a “dull” box, a
drive lever. This is an easy part to replace on an Oster™ “sharp” box of used blades, and new blades in their
clipper (as shown in Figure 4.11). This compartment is shipping containers. Whether using a re‐sharpened
accessed by removing the two Philips screws on the front blade or a new blade there is a shipping oil applied to
panel of the clipper. This compartment is also where you the blades that needs to be removed before they are
grease the clipper every 6 months. Older models will also used. Find the blade wash, read the directions on the
become packed with hair and it is a good practice to container, and proceed to wash the blade (Figure 4.12).
check the compartment every few months and clean it Blade wash can also be used if the clipper has been run
out with a cotton swab. through bloody or pus‐filled hair.
To reattach the clipper head to the clipper, slide the There are companies that repair clippers and sharpen
clipper onto the pin (Figure 4.9). Then plug the clipper blades for less than it takes to buy new. A quality clipper
in and start it by flipping the switch on the end or push- that will last years, if taken care of, will cost between $150
ing the button on the body forward. Then push the clip- and $200. The blades are about $25–$30 each. Most
per head back into place and if the top blade does not clinics will have two sizes of clipper heads available. A
move press the head in a bit more. Spray disinfecting size 40 clipper head will take the hair off down to the
spray made for clippers on to the running blades fol- skin. This one is used for shaving surgical, wound, and IV
lowed by cooling spray for the air‐driven clippers or oil catheter sites. A size 10 clipper head will leave about 1/4
right at the junction of the blades for the oil‐cooled clip- of an inch and is used to trim out mats (Figure 4.13).
pers (Figure 4.12). The clipper is now ready to be used Notice the length of the teeth when comparing the size
on another patient. 10 to the 40. There are a few different sized clipper heads