
Page 97 - Barbara Merry - The Splicing Handbook
P. 97
No exact measurements are needed to splice this rope, but for an eye or a loop
3 inches (75 mm) or smaller, use the Locked Eye Splice described later in this
chapter.
Lay out your rope and form the necessary loop. For splicing ropes of ¼ to
½inch (6 to 12 mm) (the most commonly used sizes), allow about 1½ to 2 feet
(450 to 600 mm) for the tail.
Taper the end of the rope by cutting it at a 45-degree angle. Pinch this tapered
end into the hollow of the fid or slide it like a sleeve over the knitting needle or
piece of coat hanger, then tape it tightly.
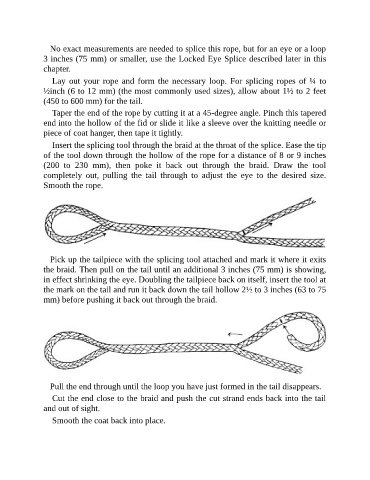
Insert the splicing tool through the braid at the throat of the splice. Ease the tip
of the tool down through the hollow of the rope for a distance of 8 or 9 inches
(200 to 230 mm), then poke it back out through the braid. Draw the tool
completely out, pulling the tail through to adjust the eye to the desired size.
Smooth the rope.
Pick up the tailpiece with the splicing tool attached and mark it where it exits
the braid. Then pull on the tail until an additional 3 inches (75 mm) is showing,
in effect shrinking the eye. Doubling the tailpiece back on itself, insert the tool at
the mark on the tail and run it back down the tail hollow 2½ to 3 inches (63 to 75
mm) before pushing it back out through the braid.
Pull the end through until the loop you have just formed in the tail disappears.
Cut the end close to the braid and push the cut strand ends back into the tail
and out of sight.
Smooth the coat back into place.