
Page 56 - 3D Artist 110 - 2017 UK
P. 56
Model concepts in ZBrush and create custoM Brushes
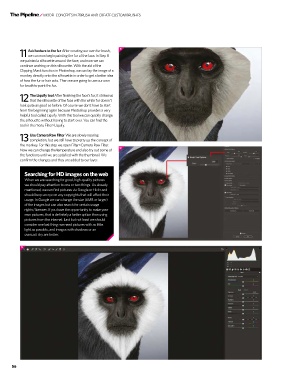
11
Add texture to the fur after creating our own fur brush,
11 we can now begin painting the fur of the face. in step 8
we painted a silhouette around the face, and now we can
continue working on this silhouette. With the aid of the
clipping Mask function in photoshop, we can lay the image of a
monkey directly onto the silhouette in order to get a better idea
of how the fur or hair acts. then we are going to use our own
fur brush to paint the fur.
The Liquify tool after inishing the face’s fur, it strikes us
12 that the silhouette of the face with the white fur doesn’t
look quite as good as before. of course we don’t have to start
from the beginning again because photoshop provides a very
helpful tool called liquify. With this tool we can quickly change
the silhouette without having to start over. You can ind the
tool in the menu Filter>liquify.
Use Camera Raw Filter We are slowly nearing
13 completion, but we still have to pretty up the concept of
the monkey. For this step we open Filter>camera raw Filter.
12
now we can change the temperature and also try out some of
the functions until we are satisied with the thumbnail. We
conirm the changes and they are added to our layer.
searching for HD images on the web
When we are searching for good, high-quality pictures
we should pay attention to one or two things. as already
mentioned, we can ind pictures via Google or Flickr and
should keep an eye on any copyrights that will affect their
usage. in Google we can change the size (6MB or larger)
of the images but can also search for certain usage
rights/licences. if you have the opportunity to make your
own pictures, that is deinitely a better option than using
pictures from the internet. last but not least we should
consider one last thing: we need pictures with as little
light as possible, and images with shadows or an
overcast sky are better.
13
56