
Page 438 - Divyank Tyagi
P. 438
404 | ChaPter 10 Working With Phasing, grouPs, and design oPtions
As you can see, the finished existing space is really two areas. In this scenario, the tenant in
the lower-left space is expanding and will be taking over the upper space. The idea is that we’re
going to demolish the space in stages. We don’t want to upset the existing tenants to complete
the phased work.
Phase 1: Demolition
In the first phase of our exercise project, we will indicate some of the existing walls to be
demolished. You don’t want to demolish them in the existing Level 1 floor plan view because the
demolition should take place at the start of the New Construction phase. That said, there will
be two construction phases (so there will also be two demolition phases). Create the new phases
and associated plans by following these steps:
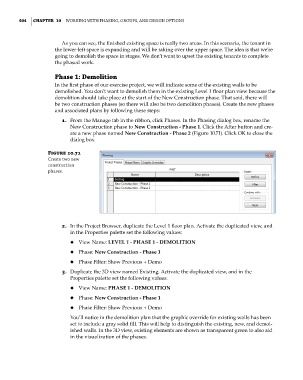
1. From the Manage tab in the ribbon, click Phases. In the Phasing dialog box, rename the
New Construction phase to New Construction - Phase 1. Click the After button and cre-
ate a new phase named New Construction - Phase 2 (Figure 10.71). Click OK to close the
dialog box.
Figure 10.71
Create two new
construction
phases.
2. In the Project Browser, duplicate the Level 1 floor plan. Activate the duplicated view, and
in the Properties palette set the following values:
◆ ◆ View Name: LEVEL 1 - PHASE 1 - DEMOLITION
◆ ◆ Phase: New Construction - Phase 1
◆ ◆ Phase Filter: Show Previous + Demo
3. Duplicate the 3D view named Existing. Activate the duplicated view, and in the
Properties palette set the following values:
◆ ◆ View Name: PHASE 1 - DEMOLITION
◆ ◆ Phase: New Construction - Phase 1
◆ ◆ Phase Filter: Show Previous + Demo
You’ll notice in the demolition plan that the graphic override for existing walls has been
set to include a gray solid fill. This will help to distinguish the existing, new, and demol-
ished walls. In the 3D view, existing elements are shown as transparent green to also aid
in the visualization of the phases.
c10.indd 404 5/3/2014 11:05:02 AM