
Page 171 - Photoshop for Lightroom Users – Scott Kelby 2nd Edition
P. 171
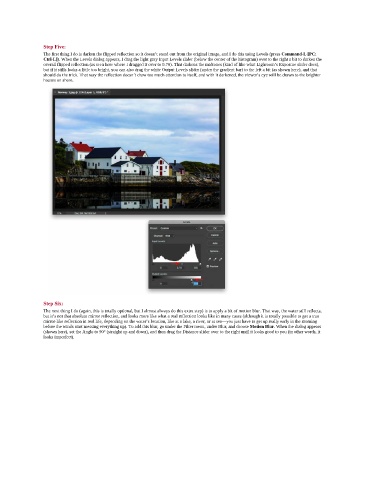
Step Five:
               The first thing I do is darken the flipped reflection so it doesn’t stand out from the original image, and I do this using Levels (press Command-L [PC:
               Ctrl-L]). When the Levels dialog appears, I drag the light gray Input Levels slider (below the center of the histogram) over to the right a bit to darken the
               overall flipped reflection (as seen here where I dragged it over to 0.70). That darkens the midtones (kind of like what Lighroom’s Exposure slider does),
               but if it stills looks a little too bright, you can also drag the white Output Levels slider (under the gradient bar) to the left a bit (as shown here), and that
               should do the trick. That way the reflection doesn’t draw too much attention to itself, and with it darkened, the viewer’s eye will be drawn to the brighter
               houses on shore.


               Step Six:
               The next thing I do (again, this is totally optional, but I almost always do this extra step) is to apply a bit of motion blur. That way, the water still reflects,
               but it’s not that absolute mirror reflection, and looks more like what a real reflection looks like in many cases (although it is totally possible to get a true
               mirror-like reflection in real life, depending on the water’s location, like at a lake, a river, or at sea—you just have to get up really early in the morning
               before the winds start messing everything up). To add this blur, go under the Filter menu, under Blur, and choose Motion Blur. When the dialog appears
               (shown here), set the Angle to 90° (straight up and down), and then drag the Distance slider over to the right until it looks good to you (in other words, it
               looks imperfect).