
Page 127 - Act! Marketing Automation User Guide
P. 127
Web End User Training Guide Drip Marketing
Similarly to creating an Opportunity, there are several fields that need to be completed.
Creating a call means that once a contact follows this particular branch of your campaign,
a call will automatically be scheduled with them in your Act! database, again a huge time
saver rather than manually setting up the activities for each contact. All the users of your
database need to do is to check their calendar whenever they log into Act! and wait for
these activities to appear.
You will need to choose which of your users will actually make the phone call. Again you
can choose for this to be the record manager of the individual contact, or if you have a
specific member of staff that you would like to perform the call, you can select them instead.
Make sure to choose Call as the activity type, then complete the next two fields to provide
more details of the call. These should be used to indicate to the user exactly why this call
has been scheduled, therefore again it is an excellent idea to reference the specific Drip
Marketing campaign that has resulted in the call being created.
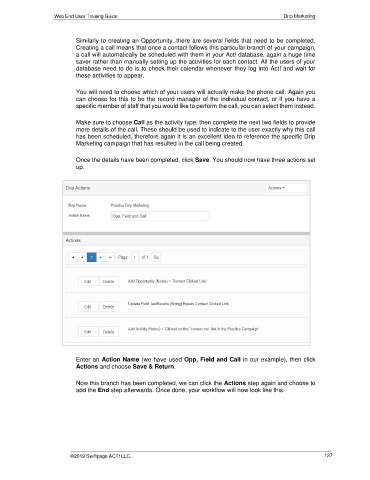
Once the details have been completed, click Save. You should now have three actions set
up.
Enter an Action Name (we have used Opp, Field and Call in our example), then click
Actions and choose Save & Return.
Now this branch has been completed, we can click the Actions step again and choose to
add the End step afterwards. Once done, your workflow will now look like this:
©2019 Swiftpage ACT! LLC. 127