
Page 17 - Airstream™ Series Dryer
P. 17
AIRSTREAM™ SERIES DRYER
Installation
Airstream™ / Pro Airstream™ Frame With Top Nozzle
Frame Assembly
Note: Uncrate and inspect shipment for damage and verify that all items listed on your packing
slip have been delivered. If there is any damaged equipment or discrepancies, file a claim
with the trucking company immediately, Receiving party is responsible for filing any claim
with trucking company. Notify your local distributor or Belanger, Inc. immediately If
shipment is determined damaged or incomplete.
Note: Do not remove any clear plastic wrap until instructed to do so.
1) Remove all shipping materials from the load (i.e. steel bands and wire ties).
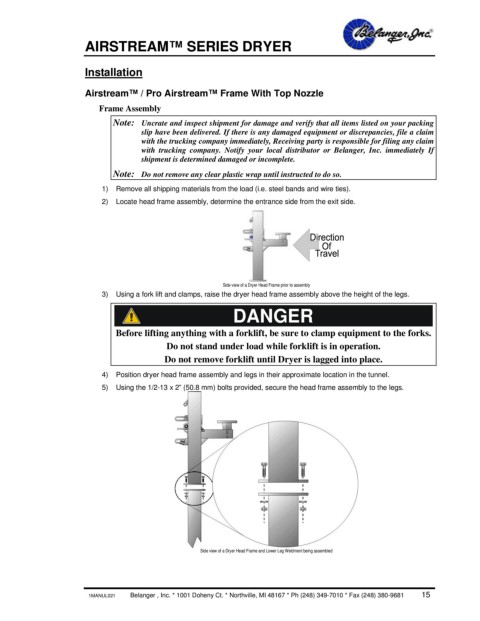
2) Locate head frame assembly, determine the entrance side from the exit side.
Side view of a Dryer Head Frame prior to assembly
3) Using a fork lift and clamps, raise the dryer head frame assembly above the height of the legs.
DANGER
Before lifting anything with a forklift, be sure to clamp equipment to the forks.
Do not stand under load while forklift is in operation.
Do not remove forklift until Dryer is lagged into place.
4) Position dryer head frame assembly and legs in their approximate location in the tunnel.
5) Using the 1/2-13 x 2” (50.8 mm) bolts provided, secure the head frame assembly to the legs.
Side view of a Dryer Head Frame and Lower Leg Weldment being assembled
1MANUL021 Belanger , Inc. * 1001 Doheny Ct. * Northville, MI 48167 * Ph (248) 349-7010 * Fax (248) 380-9681 15