
Page 44 - AirBlade® Dryer Signature® Series
P. 44
AIRBLADE® DRYER Signature ® Series
Installation
AirBlade® Express, Frame Assembly
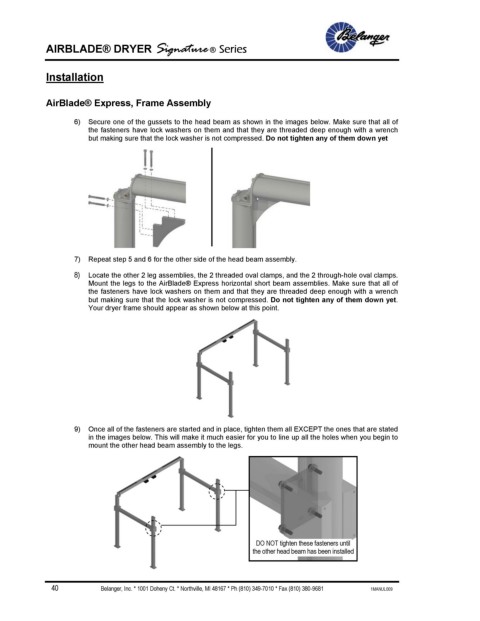
6) Secure one of the gussets to the head beam as shown in the images below. Make sure that all of
the fasteners have lock washers on them and that they are threaded deep enough with a wrench
but making sure that the lock washer is not compressed. Do not tighten any of them down yet
7) Repeat step 5 and 6 for the other side of the head beam assembly.
8) Locate the other 2 leg assemblies, the 2 threaded oval clamps, and the 2 through-hole oval clamps.
Mount the legs to the AirBlade® Express horizontal short beam assemblies. Make sure that all of
the fasteners have lock washers on them and that they are threaded deep enough with a wrench
but making sure that the lock washer is not compressed. Do not tighten any of them down yet.
Your dryer frame should appear as shown below at this point.
9) Once all of the fasteners are started and in place, tighten them all EXCEPT the ones that are stated
in the images below. This will make it much easier for you to line up all the holes when you begin to
mount the other head beam assembly to the legs.
DO NOT tighten these fasteners until
the other head beam has been installed
40 Belanger, Inc. * 1001 Doheny Ct. * Northville, MI 48167 * Ph (810) 349-7010 * Fax (810) 380-9681 1MANUL009