
Page 36 - Computer Basics - Research
P. 36
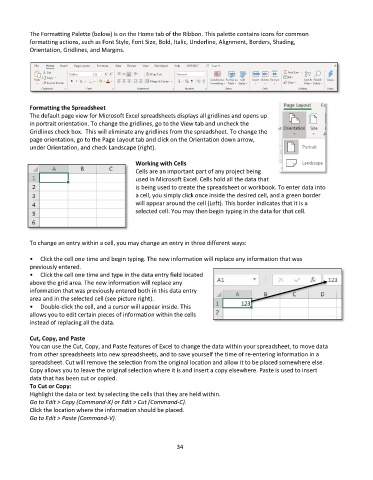
The Formatting Palette (below) is on the Home tab of the Ribbon. This palette contains icons for common
           formatting actions, such as Font Style, Font Size, Bold, Italic, Underline, Alignment, Borders, Shading,
           Orientation, Gridlines, and Margins.


           Formatting the Spreadsheet
           The default page view for Microsoft Excel spreadsheets displays all gridlines and opens up
           in portrait orientation. To change the gridlines, go to the View tab and uncheck the
           Gridlines check box.  This will eliminate any gridlines from the spreadsheet. To change the
           page orientation, go to the Page Layout tab and click on the Orientation down arrow,
           under Orientation, and check Landscape (right).

                                               Working with Cells
                                               Cells are an important part of any project being
                                               used in Microsoft Excel. Cells hold all the data that
                                               is being used to create the spreadsheet or workbook. To enter data into
                                               a cell, you simply click once inside the desired cell, and a green border
                                               will appear around the cell (Left). This border indicates that it is a
                                               selected cell. You may then begin typing in the data for that cell.


           To change an entry within a cell, you may change an entry in three different ways:

           •  Click the cell one time and begin typing. The new information will replace any information that was
           previously entered.
           •  Click the cell one time and type in the data entry field located
           above the grid area. The new information will replace any
           information that was previously entered both in this data entry
           area and in the selected cell (see picture right).
           •  Double-click the cell, and a cursor will appear inside. This
           allows you to edit certain pieces of information within the cells
           instead of replacing all the data.

           Cut, Copy, and Paste
           You can use the Cut, Copy, and Paste features of Excel to change the data within your spreadsheet, to move data
           from other spreadsheets into new spreadsheets, and to save yourself the time of re-entering information in a
           spreadsheet. Cut will remove the selection from the original location and allow it to be placed somewhere else.
           Copy allows you to leave the original selection where it is and insert a copy elsewhere. Paste is used to insert
           data that has been cut or copied.
           To Cut or Copy:
           Highlight the data or text by selecting the cells that they are held within.
           Go to Edit > Copy (Command-X) or Edit > Cut (Command-C).
           Click the location where the information should be placed.
           Go to Edit > Paste (Command-V).


                                                             34