
Page 1079 - Chief Architect Reference Manual
P. 1079
Camera Specification Dialog
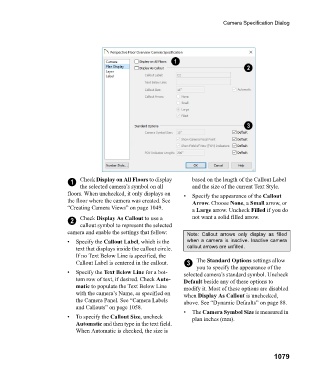
1 Check Display on All Floors to display based on the length of the Callout Label
the selected camera’s symbol on all and the size of the current Text Style.
floors. When unchecked, it only displays on • Specify the appearance of the Callout
the floor where the camera was created. See Arrow. Choose None, a Small arrow, or
“Creating Camera Views” on page 1049. a Large arrow. Uncheck Filled if you do
2 Check Display As Callout to use a not want a solid filled arrow.
callout symbol to represent the selected
camera and enable the settings that follow: Note: Callout arrows only display as filled
• Specify the Callout Label, which is the when a camera is inactive. Inactive camera
text that displays inside the callout circle. callout arrows are unfilled.
If no Text Below Line is specified, the
Callout Label is centered in the callout. 3 The Standard Options settings allow
you to specify the appearance of the
• Specify the Text Below Line for a bot- selected camera’s standard symbol. Uncheck
tom row of text, if desired. Check Auto- Default beside any of these options to
matic to populate the Text Below Line modify it. Most of these options are disabled
with the camera’s Name, as specified on when Display As Callout is unchecked,
the Camera Panel. See “Camera Labels above. See “Dynamic Defaults” on page 88.
and Callouts” on page 1058.
• The Camera Symbol Size is measured in
• To specify the Callout Size, uncheck plan inches (mm).
Automatic and then type in the text field.
When Automatic is checked, the size is
1079