
Page 215 - FreesStyler® Installation and Startup
P. 215
®
INSTALLATION AND STARTUP
Chapter 10 Initial Startup
Startup Procedure
Top Wheel Counterweight Setup
2) Set Top Wheel Counter Weight
The standard fill Top Wheel has approximately 10 to 13 pounds of penetration whereas the Neo-Tex® Whisper
Wheel fill has approximately 18 to 20 pounds of penetration. See chart below for details on desired weight
adjustments which applies to both fills.
Remove Weight Penetration Result NOTE
A or B Adds 3 pounds each The weight may fit too tight to just
C or D Adds 5 pounds each slide out. The use of a 3/8-16 x 1-
A plus B Adds 6 pounds total 3/4” bolt and a 3/8” nut may be
A plus C Adds 8 pounds total used to spread the arms
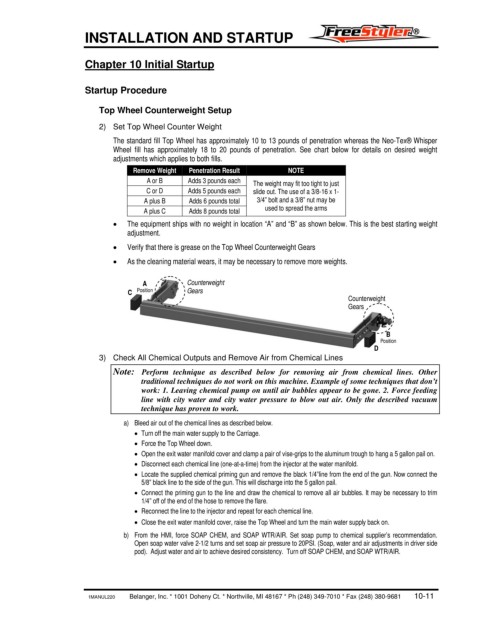
• The equipment ships with no weight in location “A” and “B” as shown below. This is the best starting weight
adjustment.
• Verify that there is grease on the Top Wheel Counterweight Gears
• As the cleaning material wears, it may be necessary to remove more weights.
A Counterweight
C Position Gears
Counterweight
Gears
B
Position
D
3) Check All Chemical Outputs and Remove Air from Chemical Lines
Note: Perform technique as described below for removing air from chemical lines. Other
traditional techniques do not work on this machine. Example of some techniques that don’t
work: 1. Leaving chemical pump on until air bubbles appear to be gone. 2. Force feeding
line with city water and city water pressure to blow out air. Only the described vacuum
technique has proven to work.
a) Bleed air out of the chemical lines as described below.
• Turn off the main water supply to the Carriage.
• Force the Top Wheel down.
• Open the exit water manifold cover and clamp a pair of vise-grips to the aluminum trough to hang a 5 gallon pail on.
• Disconnect each chemical line (one-at-a-time) from the injector at the water manifold.
• Locate the supplied chemical priming gun and remove the black 1/4”line from the end of the gun. Now connect the
5/8” black line to the side of the gun. This will discharge into the 5 gallon pail.
• Connect the priming gun to the line and draw the chemical to remove all air bubbles. It may be necessary to trim
1/4” off of the end of the hose to remove the flare.
• Reconnect the line to the injector and repeat for each chemical line.
• Close the exit water manifold cover, raise the Top Wheel and turn the main water supply back on.
b) From the HMI, force SOAP CHEM, and SOAP WTR/AIR. Set soap pump to chemical supplier’s recommendation.
Open soap water valve 2-1/2 turns and set soap air pressure to 20PSI. (Soap, water and air adjustments in driver side
pod). Adjust water and air to achieve desired consistency. Turn off SOAP CHEM, and SOAP WTR/AIR.
1MANUL220 Belanger, Inc. * 1001 Doheny Ct. * Northville, MI 48167 * Ph (248) 349-7010 * Fax (248) 380-9681 10-11