
Page 23 - Gyro Wrap™ Signature ® Series
P. 23
GYRO WRAP™ Signature ® Series
Installation
Inserting the Shaft
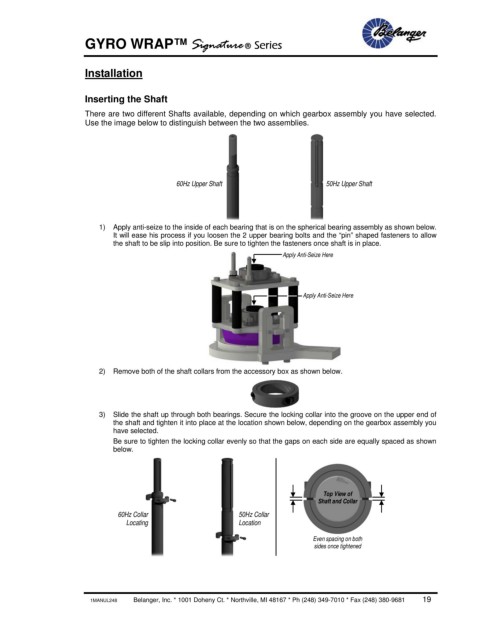
There are two different Shafts available, depending on which gearbox assembly you have selected.
Use the image below to distinguish between the two assemblies.
60Hz Upper Shaft 50Hz Upper Shaft
1) Apply anti-seize to the inside of each bearing that is on the spherical bearing assembly as shown below.
It will ease his process if you loosen the 2 upper bearing bolts and the “pin” shaped fasteners to allow
the shaft to be slip into position. Be sure to tighten the fasteners once shaft is in place.
Apply Anti-Seize Here
Apply Anti-Seize Here
2) Remove both of the shaft collars from the accessory box as shown below.
3) Slide the shaft up through both bearings. Secure the locking collar into the groove on the upper end of
the shaft and tighten it into place at the location shown below, depending on the gearbox assembly you
have selected.
Be sure to tighten the locking collar evenly so that the gaps on each side are equally spaced as shown
below.
Top View of
Shaft and Collar
60Hz Collar 50Hz Collar
Locating Location
Even spacing on both
sides once tightened
1MANUL248 Belanger, Inc. * 1001 Doheny Ct. * Northville, MI 48167 * Ph (248) 349-7010 * Fax (248) 380-9681 19