
Page 38 - TopWinder®
P. 38
®
®
TopWinder
Installation
Loading the ShineMitt™ onto the Hub Assembly
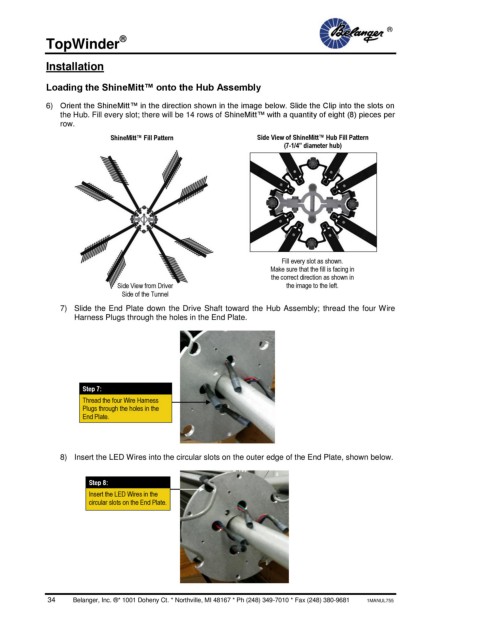
6) Orient the ShineMitt™ in the direction shown in the image below. Slide the Clip into the slots on
the Hub. Fill every slot; there will be 14 rows of ShineMitt™ with a quantity of eight (8) pieces per
row.
ShineMitt™ Fill Pattern Side View of ShineMitt™ Hub Fill Pattern
(7-1/4” diameter hub)
Fill every slot as shown.
Make sure that the fill is facing in
the correct direction as shown in
Side View from Driver the image to the left.
Side of the Tunnel
7) Slide the End Plate down the Drive Shaft toward the Hub Assembly; thread the four Wire
Harness Plugs through the holes in the End Plate.
Step 7:
Thread the four Wire Harness
Plugs through the holes in the
End Plate.
8) Insert the LED Wires into the circular slots on the outer edge of the End Plate, shown below.
Step 8:
Insert the LED Wires in the
circular slots on the End Plate.
34 Belanger, Inc. ®* 1001 Doheny Ct. * Northville, MI 48167 * Ph (248) 349-7010 * Fax (248) 380-9681 1MANUL755